Sep 13, 2026
Installing Nano Insulation Boards in Steel Ladles: A Field Guide to Lining Sequence and First Heat-Up
A field-level installation guide for microporous nano insulation boards in steel ladle back-up linings — receiving, storage, cutting, dry jointing, anchoring and first heat-up, written for relining su
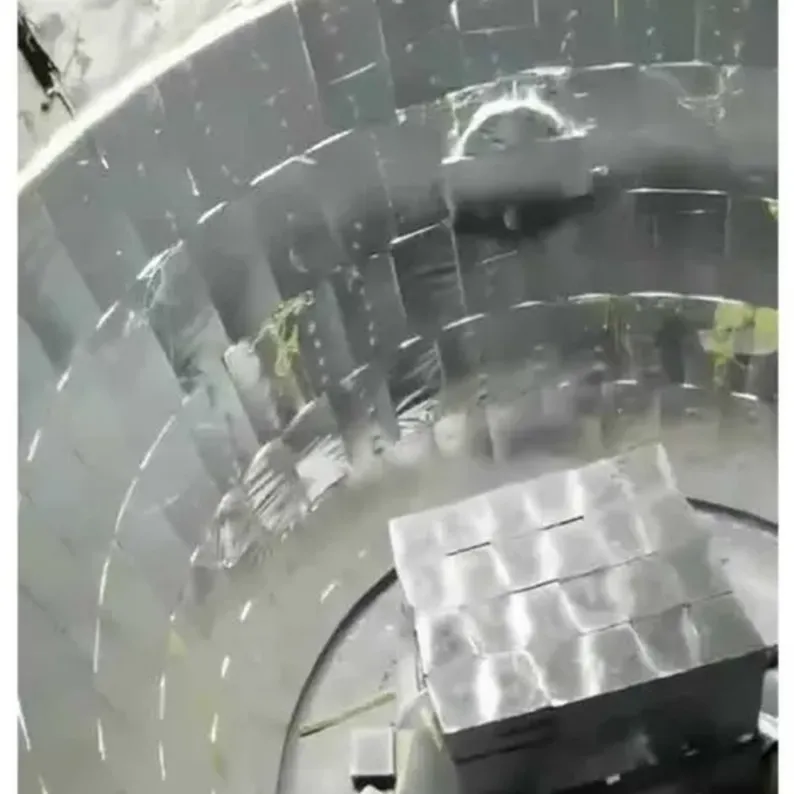
Microporous nano insulation board is a high-performance product, but it only performs if it is installed as a system. In relining work we have supervised across more than 60 ladles, tundishes and furnace walls, the failure pattern is consistent: when a nano lining fails early, the cause is handling, joint design or anchoring — not the material itself. Even high-strength nano insulation boards, specified and manufactured correctly, will not reach their service life if the crew handles them like calcium silicate.
This guide is written for relining supervisors, plant maintenance teams and refractory contractors installing microporous boards for the first time. It covers the sequence from the moment the crate arrives to the first heat-up and the post-campaign inspection. The five buying mistakes we documented in our procurement guide cover the commercial side; if you are still building the business case, our article on why steel mills are switching to nano boards for ladle back-up lining covers the operating numbers.
Before you start: receiving, storage and board inspection
Most boards arrive in timber crates with edge protectors, and the first inspection happens on the dock, not on the ladle deck.
Record crate condition and the humidity indicator card before opening. A damaged card warns that the boards may have absorbed moisture in transit.
Boards are typically 1200 x 600 x 50 mm for ladle back-up work. Check sample dimensions against the packing list; a tolerance of roughly plus or minus 2 mm is normal and should be planned into the joint layout.
Set an acceptance rule before unloading: through-thickness cracks are a reject, and edge chips deeper than 8 mm go to a separate evaluation pile. Small chips and surface marks do not affect insulation performance.
Store boards under cover, off the concrete floor on battens, away from steam lines and open water. Relative humidity below 75 percent is the practical target.
Microporous board is brittle in the same way a good insulating firebrick is. Crews that treat the crate as fragile cargo rarely have field problems.
Preparing the shell and the supporting layer
A nano back-up lining is only as good as the surface it sits on.
Remove all old insulation and loose scale down to clean steel. Where the previous lining delaminated, the steel behind it is often distorted or has localised hot spots — inspect both.
Check the shell for deformation. A bulge of more than a few millimetres over a board width creates point loading on a rigid panel and should be recorded and dressed before lining.
Lay out and weld the anchor studs before any board is placed. Marking the pattern on the shell first is faster and more accurate than improvising around boards already in position.
On most ladle designs the nano boards sit behind the working lining and never see steel or slag. Confirm this boundary condition with the lining designer before ordering the grade. A 50 mm SLM-1000 nano back-up lining behind a 150 mm working lining is common on 100 to 150 ton ladles. Where the working lining is thinner, or mean service temperature runs above 1000 C, the SLM-1200 grade — rated for 1200 C continuous service — is the safer specification.
Cutting: tooling, dust and edge finish
Cutting is where most of the damage that shows up later actually starts.
Use a fine-tooth carbide-tipped saw, a diamond blade on a wet saw, or a water-jet. A standard masonry blade shatters the pressed silica skin and starts micro-cracks that grow under thermal cycling.
The dust is fine fumed silica and ceramic fibre. Cut wet where the tool allows; otherwise use extraction and respiratory protection rated for fine mineral dust.
Remove burrs and loose particles from every cut edge. A clean edge gives a predictable 1 to 2 mm joint; a ragged edge hides the true gap and creates point contact.
Cut boards 2 to 3 mm under the measured opening. Forcing a rigid board into a tight pocket is the fastest way to chip a corner, and a chipped corner in a back-up lining is a heat-leak path.
Laying sequence: dry joints, staggered courses, expansion allowance
Nano boards are installed dry. No mortar, no wet joint, no forcing.
Lay boards with dry butt joints and leave a deliberate 1 to 2 mm gap between adjacent boards. The gap closes as the lining heats and expands; a tightly butted joint has nowhere to go and spalls at the edges.
Stagger courses so vertical joints do not line up across adjacent layers. A stagger of at least half a board width turns a continuous joint into short, sealed paths.
Work from the bottom of the ladle upward, holding each course with temporary wedges until the anchors are set.
Do not glue boards to the shell or to each other. The microporous structure does not bond well, and dried adhesive becomes a rigid bridge that transfers shell movement into the board. The anchors hold the lining; the joints absorb the movement.
At any change in geometry, fit the larger board first and cut the smaller infill to the actual measured gap.
Anchoring practice: hardware and patterns
Anchors have one job: keep each board pressed against its support through hundreds of heats.
Use stainless steel 310 or 316 studs and washers. Zinc-plated carbon steel melts at roughly 420 C and fails within a few cycles — the most common hardware mistake we see in the field.
Use non-conductive ceramic washers under the anchor head. Bare steel touching the board face is a local heat bridge to the shell and appears as a hot spot on a thermal camera.
A six-anchor pattern per 1200 x 600 mm board, positioned well inside the corners, is the layout we use for ladle back-up work. The anchored ladle back-up assembly on our applications page shows the standard arrangement.
Tighten anchors to hold the board firmly without crushing it. Microporous board compresses slightly under load; the target is contact, not preload.
On walls over about 600 mm in the board's long direction, add a mid-board anchor row. Vibration during ladle transport is real, and an unanchored board works loose over time.
Corners, penetrations and curved sections
Corners and openings leak heat first, so they deserve the most careful fitting.
For curved ladle walls, cut boards into wedge segments rather than bending a full-width panel. Microporous board does not flex; it fractures.
On tight radii, increase the number of segments and keep the joints radial — a consistent pattern is easier to seal than a few large irregular gaps.
Cut penetrations for porous plugs, sampling ports and thermocouples as separate pieces with 5 to 8 mm of clearance around the fitting. Never knock a hole through an installed board.
At internal corners, stagger the joints so no straight joint runs through the corner line, preventing a continuous crack path over many cycles.
First heat-up and the post-campaign check
The first heat-up is a controlled event, not an operational afterthought.
Ramp in stages rather than pushing straight to service temperature. A schedule of roughly 100 to 150 C per hour with a hold at intermediate temperature lets the board shed installation moisture and seat against its supports.
Monitor shell temperature during the first campaign. A stable, uniform shell reading across the board field confirms the joints were cut and laid correctly.
At the first cool-down, inspect joints before the next heat-up. Openings of 1 to 3 mm are normal and close again on the next heat; growing cracks, displaced boards or loosened washers are not, and should be corrected early.
Keep a simple lining record: board and anchor batches, joint gaps at first cool-down, shell temperatures and heats achieved. Three campaigns of records turn a nano lining into a predictable maintenance item.
Pre-commissioning checklist
Run through this list before the ladle goes back into service:
Crate and humidity card recorded; storage conditions compliant.
Board batch logged; rejected boards set aside.
Shell clean, deformed areas dressed, anchor studs laid out and welded.
Anchors confirmed as 310 or 316 stainless with ceramic washers.
Cutting done with carbide or diamond tooling; edges deburred.
Joints dry, 1 to 2 mm, staggered by at least half a board across courses.
Penetrations pre-cut with clearance; nothing knocked through installed boards.
No board forced, glued or tightly butted anywhere in the lining.
Heat-up schedule agreed with operations; shell monitoring points defined.
Lining record sheet opened with batch numbers and today's date.
Closing thoughts
Microporous nano boards reward a disciplined installation. The material itself is consistent; what separates a 185-heat campaign from a 60-heat failure is almost always handling, jointing and anchoring. None of the steps above is difficult, and none requires exotic tooling — they are simply the ones that are easy to skip when a ladle is waiting and the crew is under pressure.
If you are planning a ladle, tundish or furnace relining and want a second set of eyes on the layout, send us the lining drawing or a photo with the shell dimensions. Our engineering team in Nantong will return an anchor pattern, a joint plan and a suggested heat-up schedule within one working day — contact us on WhatsApp +86 135 8471 3740.
For related reading:
— Suleiman Refractory Board Engineering Team · Nantong, Jiangsu, China